Showing posts with label halloween. Show all posts

Monday, October 12, 2015

Scary Spooky Super Moist Halloween Cakes

Our little helper wanted to make a cake and we ended up making
some Halloween cake fun.


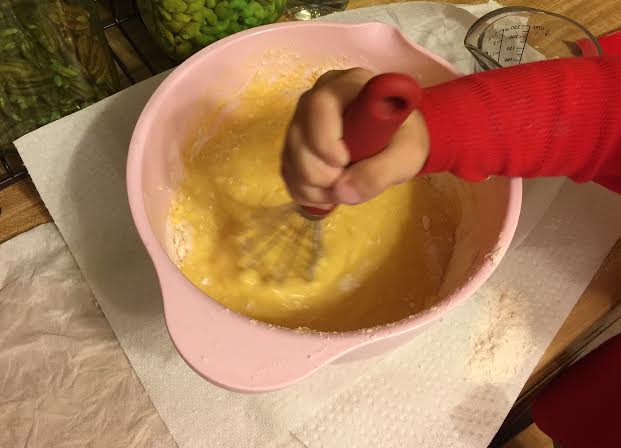


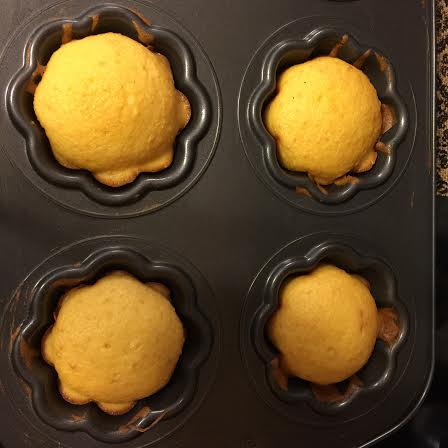


It took sooooo long.....


8 ingredients

10 min prep time

18 min cooking time


Ingredients

2 1/2  cups all-purpose flour
3  teaspoons baking powder
1/4  teaspoon salt
2  cups sugar
1  cup butter or margarine, softened
2  teaspoon vanilla
3  eggs
1  cup buttermilk


Directions

Heat oven to 350°F. Grease your choice shape of baking tins : I use Pam Baking Spray.  In medium bowl, mix flour, baking powder and salt.

In large bowl, beat sugar and butter until light and fluffy, scraping bowl occasionally. Beat in vanilla and eggs until well blended. Alternate adding the flour mixture and milk, beating well and scraping bowl after each addition. Pour batter evenly into pans.  When baking with our 3 year old I blend with a whisk for safety reasons.  

Bake 16 to 18 minutes or until toothpick inserted in center comes out clean. Cool in pans 10 minutes.  Cool completely, about 1/2 hour. Frost / Decorate as desired.

Enjoy

Angel

Thursday, September 25, 2014

Tiny Treats Bags from Fat Quarters

This is just to cute and easy so I wanted to share my find with you all.  It's from All People Quilt which is filled with all sorts of adorable sewing treasures.  

Turn Halloween-theme fat quarters and store-bought ribbon into pint-size goody bags to fill with yummy favors from this adorable little pattern found on All People Quilt


Materials for Four Bags
This project results in two sets of two contrasting bags (for example, two light bags with dark bottoms and two dark bags with light bottoms) 


•    18×22" piece (fat quarter) each of light and dark novelty prints (bags, linings)

•    4—12"-long pieces 3⁄8"-wide grosgrain ribbon: orange, black


Finished bag: 4×4×2"


Yardages and cutting instructions are based on 42" of usable fabric width. 

Measurements include 1⁄4" seam allowances. Sew with right sides together unless otherwise stated.


Cut Fabrics

Cut pieces in the following order. 
See Cutting Diagram to get the most pieces from each fat quarter. To save time, layer two fat quarters and rotary-cut through both layers.
From each light and dark novelty print, refer to Cutting Diagram and cut:
•    4—5-1⁄2×6-1⁄2" rectangles
•    4—3-1⁄2×6-1⁄2" rectangles
•    4—2-1⁄2×6-1⁄2" rectangles 


Pages


Pattern from 

All People 

Quilt 

Assemble Bags

1.    For one light bag you will need two dark print 5-1⁄2×6-1⁄2" rectangles, two darkprint 2-1⁄2×6-1⁄2" rectangles, and two light print 3-1⁄2×6-1⁄2" rectangles. 
2.    Referring to Diagram 1, join one light print 3-1⁄2×6-1⁄2" rectangle and one dark print 2-1⁄2×6-1⁄2" rectangle along one long edge to make bag piece. 
3.    Cut one 12"-long piece of ribbon into two 6"-long pieces. Referring to Diagram 2, pin ribbon ends to right side of bag piece, 2" from side edges. (If you are using a printed ribbon, place right side of ribbon toward right side of bag piece.) 
4.    Referring to Diagram 3, layer a dark print 5-1⁄2×6-1⁄2" rectangle (lining) and bag piece, right sides together. Sew together along one long edge to make a bag unit. 
5.    Repeat steps 2–4 to make a second bag unit.
6.    With right sides together, layer bag units; pin. Join units around all edges, leaving a 3" opening along lining edge for turning (Diagram 4). Press seams open.
7.    To shape flat bottom for bag, at one corner match bottom seam line to side seam line, creating a flattened triangle (Diagram 5). Measuring 1" from point of triangle, draw a 2"-long line across triangle. Sew on drawn line. Trim excess fabric, leaving 1⁄4" seam allowance. Repeat with remaining bottom corner of bag and both corners of lining.
8.    Turn bag right side out through opening and finger-press seams. Slip-stitch lining opening closed. Insert lining into bag to complete a light bag. Press along top edge.
9.    Repeat steps 1–8 to make two light bags and two dark bags, reversing fabric placement for dark bags.

Wednesday, October 23, 2013

October Sponsor Giveaway hosted by Raising Reagan

Welcome to the October Sponsor Highlights and Giveaway! The lovely ladies sponsoring my part of blogosphere have come together to let you know a little more about them and have a giveaway just for you! Say hello to the beauties that are my sponsors this month and don't forget to stick around to the end and enter the giveaway! Free exposure on some top, sought after blogs with some amazing ad space and PayPal cash!
  Raising Reagan | October Sponsor Highlights and Giveaway

Monday, October 21, 2013

Spider Web Cake


Spider Web Cake   

My kids are loving trying all these awesome new Halloween dessert treat recipes 
I've been finding.  This is a true must share recipe.  Easy and extremely fun 
to make and I found it at Better Homes & Gardens Network.  

Sunday, October 13, 2013

Halloween Treats to Make with the Kids

Halloween is coming up quickly.  My kids and I have been exploring all kinds of fun recipes we can make together.  I found these from Very Best Baking.  We've made these for years but we keep having new kids in our home so it's new to somebody every year, lol.  

Uhmm, maybe I should give that issue some thought, you think?


Graveyard Pie


Have fun with the kids creating this festive and spooky graveyard-inspired pie. A chocolate cookie crust is filled with a chocolatey pie mixture and topped with cookie crumb dirt, cookie headstones and creepy crawly gummies and bones.

Ingredients

  • 3 cups (about 32) finely ground chocolate sandwich cookie crumbs, divided
  • 3 tablespoons melted butter
  • 1 can (12 fl. oz.) NESTLÉ® CARNATION® Evaporated Milk
  • 2 large egg yolks
  • 2 tablespoons cornstarch
  • 1 3/4 cups (11.5-oz. pkg.) NESTLÉ® TOLL HOUSE® Milk Chocolate Morsels
  • 8 chocolate filled vanilla wafer cookies
  • Black and purple decorator writing gels
  • WONKA® SweeTARTS® Skulls n’ Bones*, gummy bugs or other assorted spooky Halloween candies

Directions

COMBINE 1 1/2 cups cookie crumbs and butter in 9-inch deep-dish pie plate. Press crumb mixture onto bottom and upsides of pie plate. Set aside remaining 1 1/2 cups crumbs for dirt topping.

WHISK together evaporated milk, egg yolks and cornstarch in medium saucepan. Heat over medium-low heat, stirring constantly, until mixture is very hot and thickens slightly; do not boil. Remove from heat; stir in morsels until completely melted and mixture is smooth.

POUR into crust. Sprinkle with remaining 1 1/2 cups cookie crumbs. Press crumbs down gently. Refrigerate for 3 hours or until set.

DECORATE cookie tombstones as desired with writing gels. Insert tombstones around edge of pie. With spoon, mound cookie crumbs to form “fresh graves”. Decorate graves with candy to make the pie as spooky as you want it to be!


Cobweb Cupcakes


These cupcakes with "cobwebs" on the top make a perfect spooky treat for your favorite ghouls.

Ingredients

  • 1 pkg. (18.25 oz.) devil's food or yellow cake mix
  • 2 (2.1 oz. each) NESTLÉ BUTTERFINGER Candy Bar, chopped
  • 1 container (16 oz.) prepared vanilla frosting
  • 1 cup (6 oz.) NESTLÉ® TOLL HOUSE® Semi-Sweet Chocolate Morsels
  • 1 small tube white decorator icing or gel
  • 1 pkg. (1.38 oz.) NESTLÉ GOOBERS Milk Chocolate-Covered Peanuts

Directions

PREPARE cake mix batter according to package directions; add chopped Butterfinger to batter. Bake according to directions for 24 cupcakes. Cool completely. Frost cupcakes.

PLACE morsels in small, heavy-duty plastic bag. Microwave on HIGH (100%) power for 45 seconds; knead. Microwave at additional 10- to 15-second intervals, kneading until smooth. Cut small corner from bag; squeeze to pipe concentric circles on top of frosting. Using wooden pick or tip of knife, pull tip through chocolate from center to last circle to create a cobweb effect.

MAKE 2 dots using decorator icing on each of 24 Goobers to resemble spider eyes. Place in center of each cobweb.

Have fun!
Angel

Sunday, September 29, 2013

Welcome to Week #38 of Raising Imperfection Blog Hop!


It's your favorite post Sunday link party!
We can't wait to see what you've been up to! What was your imperfection this week? Please view our very short introduction video for some link party rules and announcements.

Saturday, September 28, 2013

Super Sunday Sync Blog Hop #55! co-Hosted by Sew Crafty Angel

Welcome to Super Sunday Sync #55! You lovelies pulled through again last week for an outstanding 113 link ups! Thank you so much for helping make Super Sunday Sync a success.  We appreciate all of you, each week! You all are amazing ~ help us reach 130 link ups this week? Tweet, share, promote!
Our lovely Guest Hosts for this week. Please, stop by their blogs and give them some love!
Angel ~ Sew Crafty Angel and our Guest Host WINNER from last week is Kim from Enjoy the View

Friday, September 13, 2013

Halloween DIY Costumes for Kids


I've been searching for DIY projects to make Halloween Costumes for the kids.
Every year I try to come up with something different I can make myself.
I found some on Pinterest and wanted to share them with you.
What do think, which is your favorite?


1Ahh! Love IT! My future children will be sporting this Halloween costume at least once!

2I want to make this for myself for Halloween, is that bad?


3Bamm Bamm costume flinstones inspired animal print babies kids children infants kids baby boys  Halloween costumes Halloween school event. $79.00, via Etsy.


4Baby Minnie Mouse!


5Gumball machine costume.. adorable! via Inchmark


6DIY Cupcake Costume

7halloween costume and nutrition facts on the bag! super cute!


8Cute costume idea! HALLOWEEN

9Chicken Costume. If one if my future children ever wants to be a chicken for halloween my life will be complete. #chicken #costume #halloween


10Octopus halloween costume- socks


11Children's Halloween Costume Ideas


12Cute Scarecrows - 2013 Halloween Costume Contest


13Perfect, DIY Toddler Halloween Costume!

14Spooky Knitting: 7 DIY Halloween Costumes + Decorations from @AllFreeKnitting

15DIY Halloween DIY Costumes :DIY Animal Costume : DIY Halloween Cotsumes 2011: Penguin (from Mary Poppins)

16DIY Halloween Costume Challenge | mydiycreations


17Oh my goodness!! Definitely going to see if Grammy Snodgrass can make this for our little bean!!!!


18DIY Halloween Costume : DIY Batman Cape Pattern DIY Halloween


19Miss Banana Pants: 50 DIY Halloween Costume Ideas

20Super Girl #diy #halloweencostume #halloween #kidscostumes #costumes #superherocostumes

21DIY: Halloween Costumes DIY Halloween DIY Costumes


22tomato girls DIY costume halloween can you tell i am going for a food theme this year?!

All these and many more are pinned on my Pinterest Board under Halloween Costumes
If you would like instructions please visit my board for web addresses.